Songyue Pagoda: A Northern Wei Buddhist Pagoda in China
Site at a Glance
- Rating
- 4.9
- Popularity
- Very Low
- Country
- China
- Primary era
- Medieval
- Eras represented
- Medieval
- Civilizations
- Tang
- Site type
- Religious
- Remains
- Pagoda
On this page18 sections
History
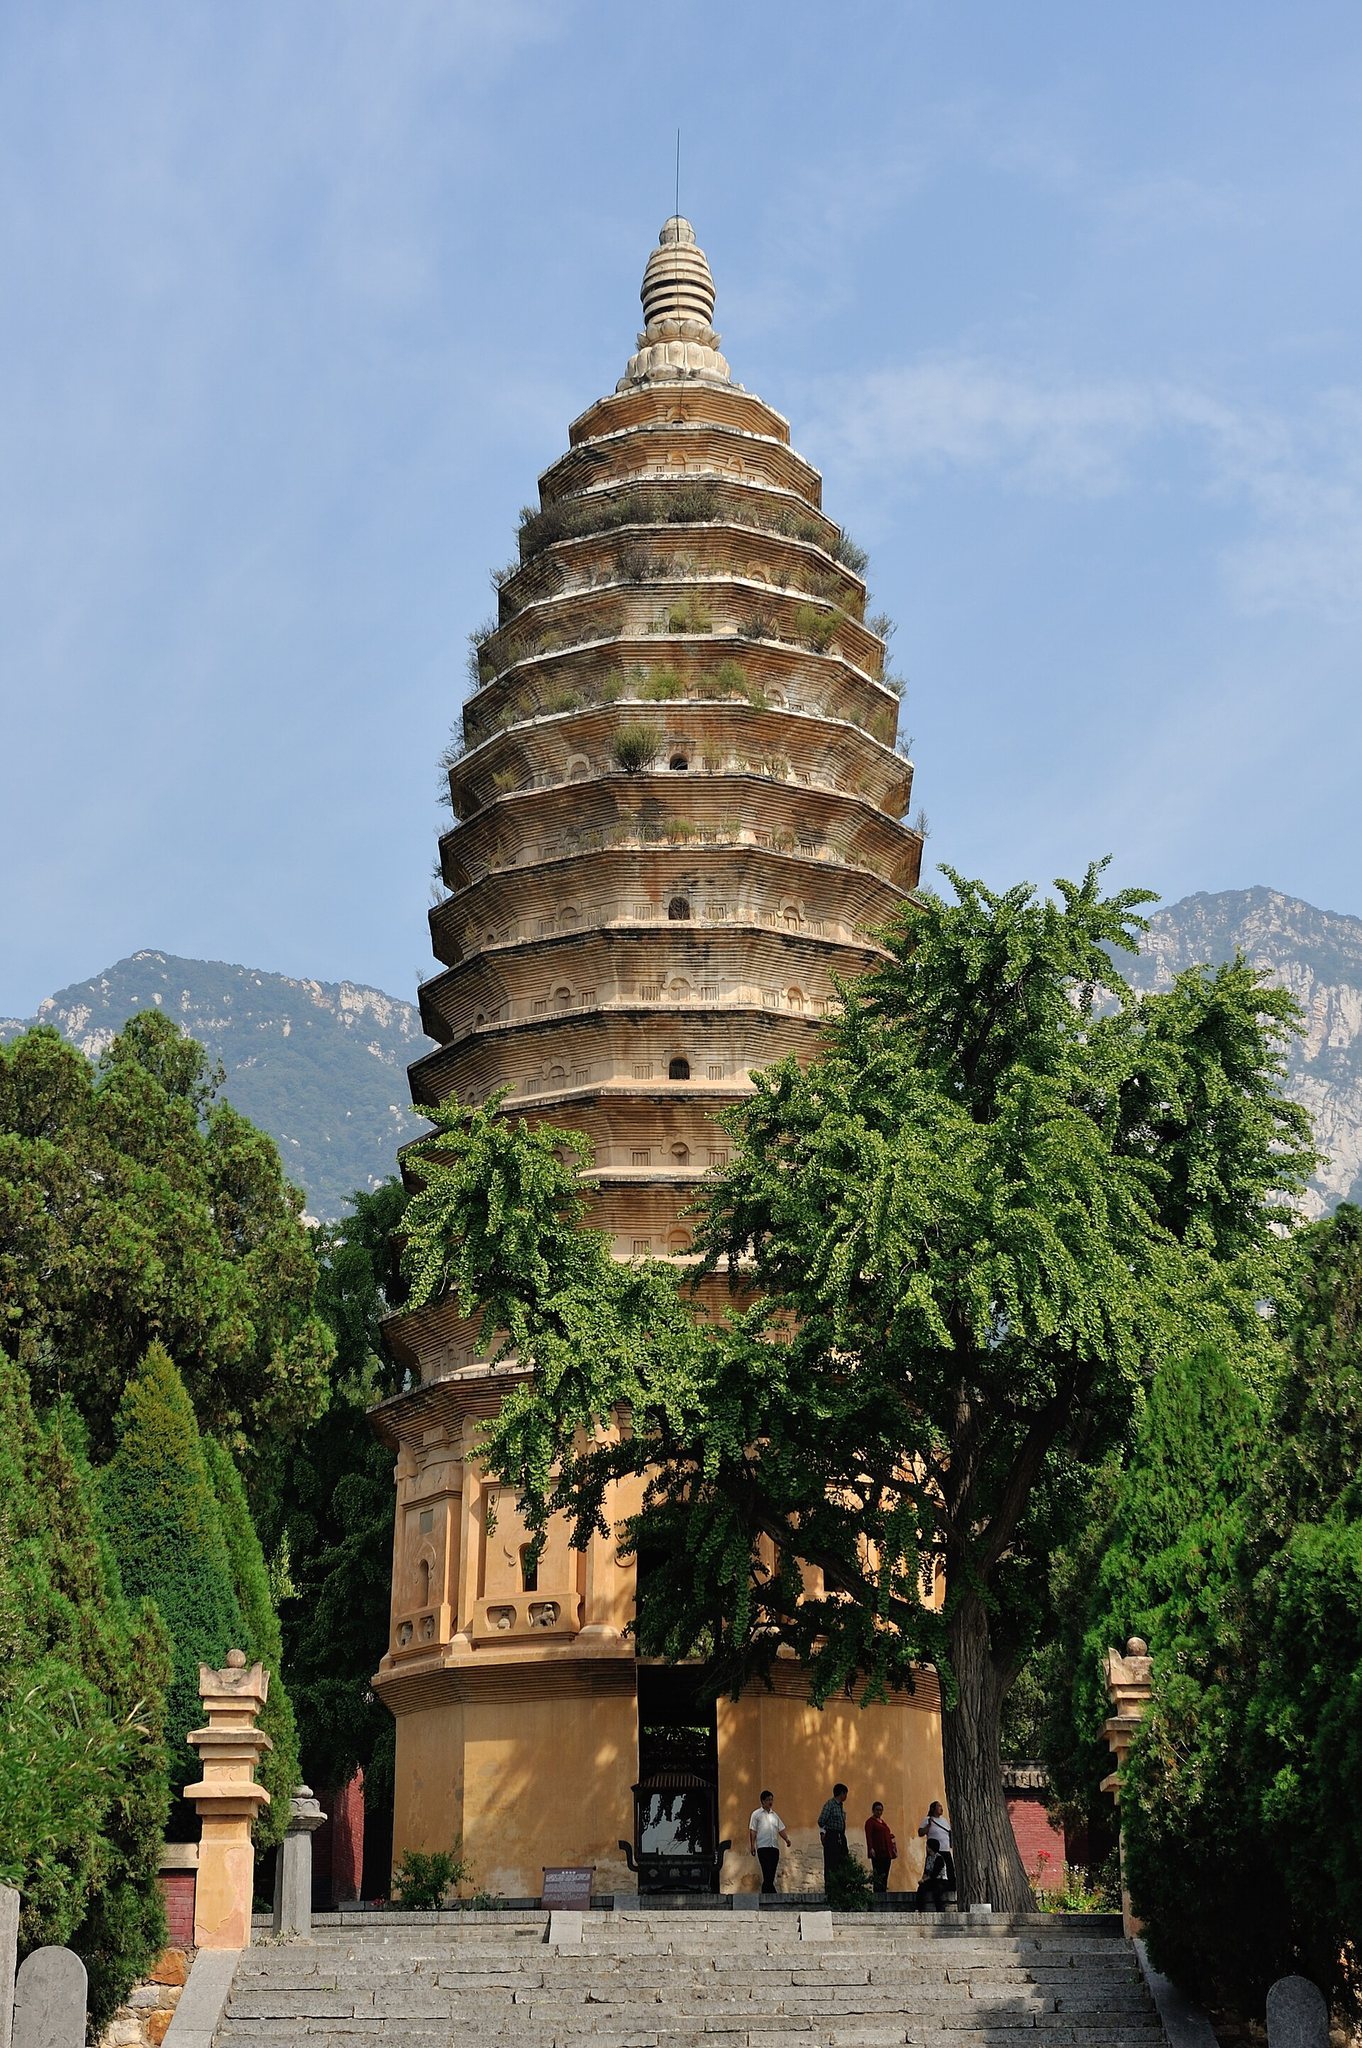
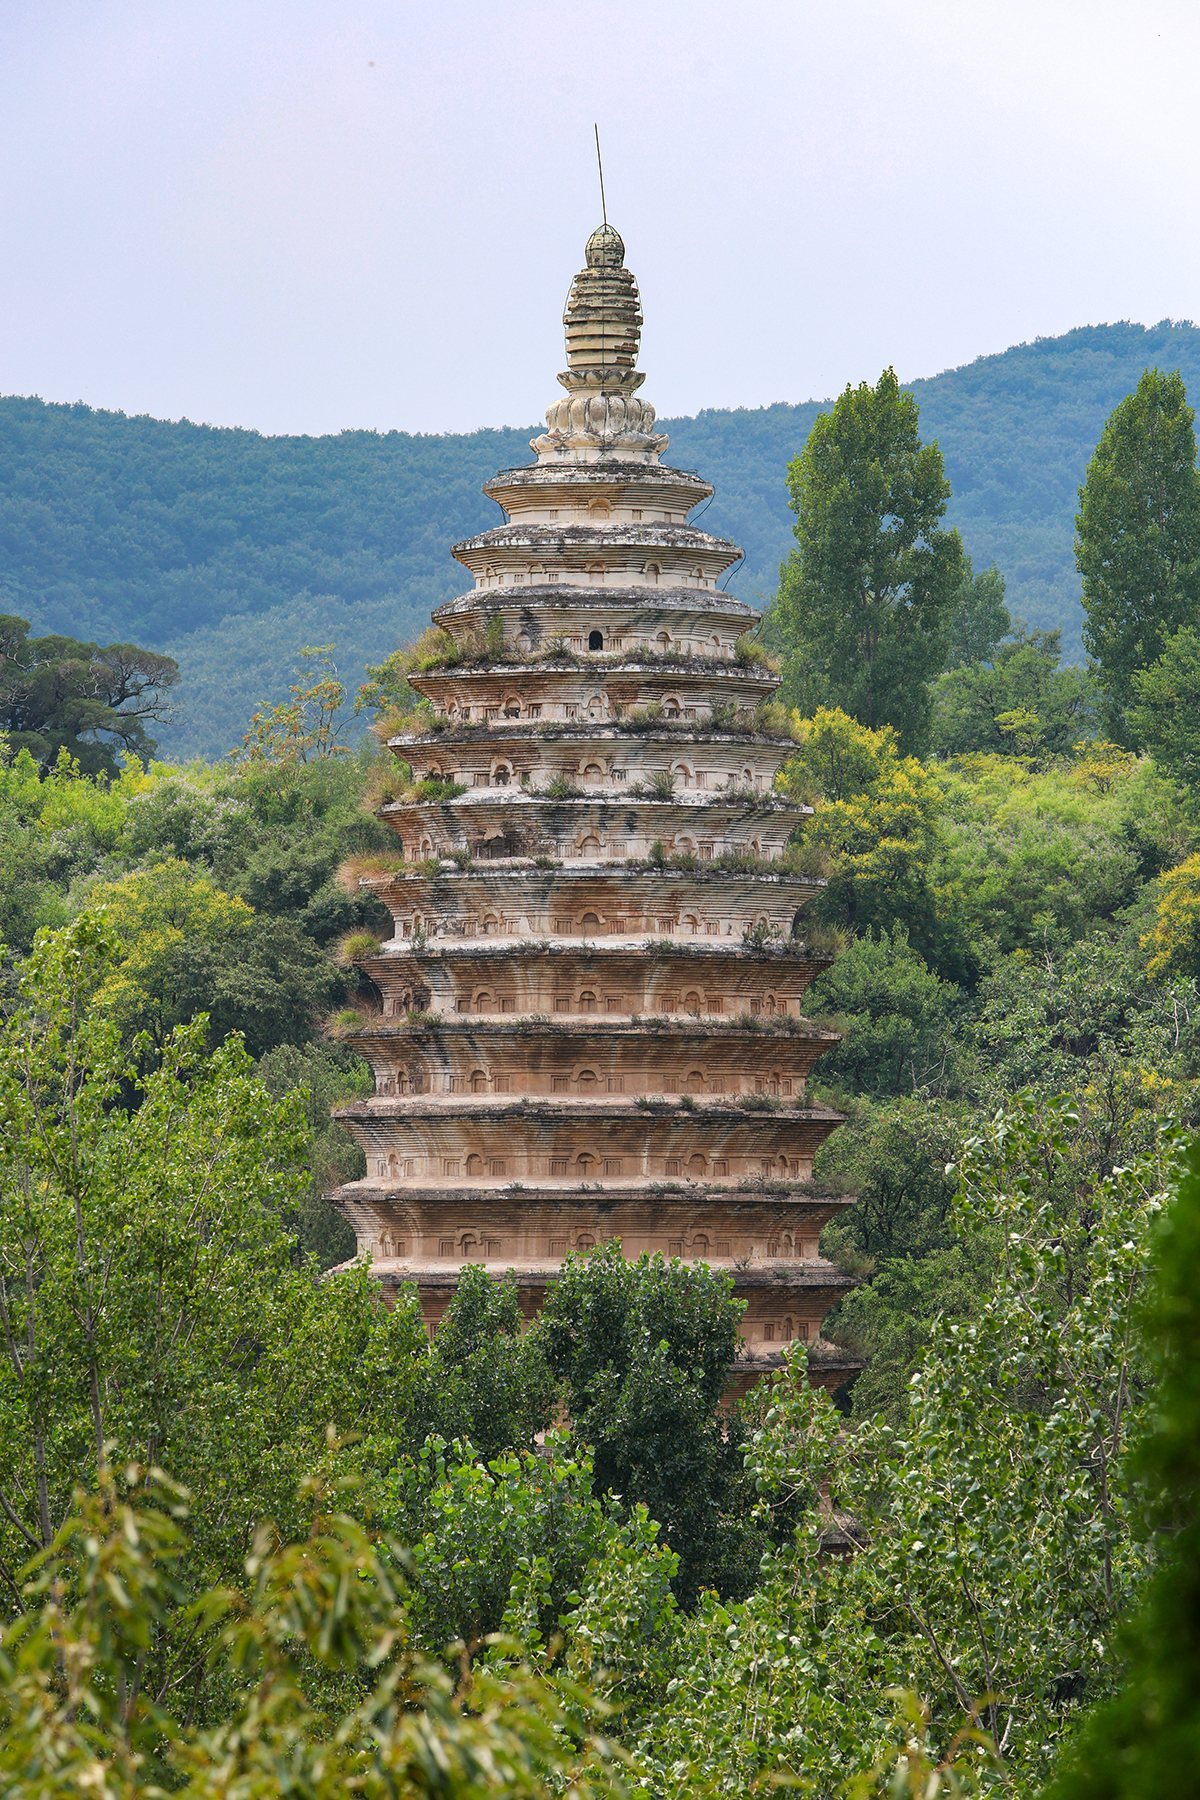
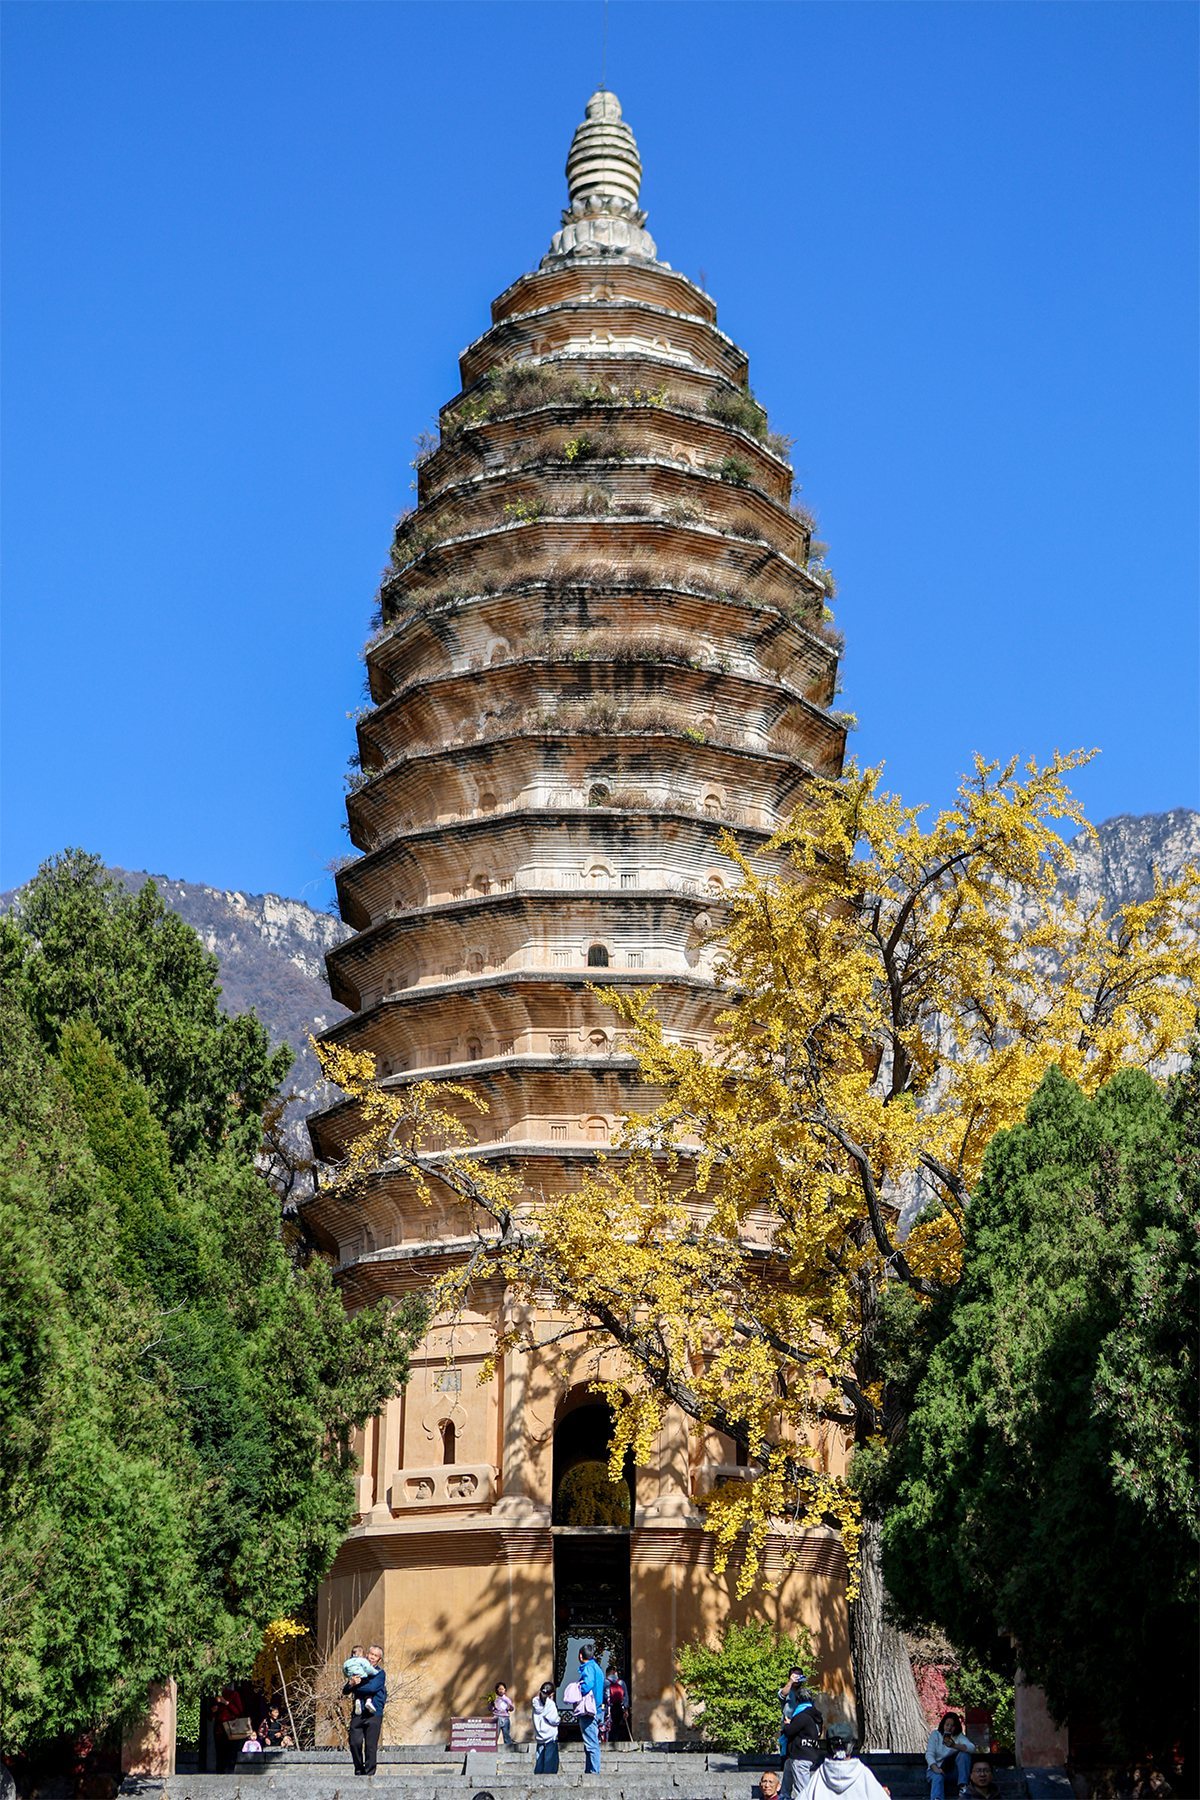
Songyue Pagoda is a Buddhist brick pagoda at Songyue Monastery on the southern foothills of Mount Song in Dengfeng, Henan, China. Built under the Northern Wei dynasty around AD 523 during the Zhengguang era, it is regarded as the earliest surviving Chinese pagoda whose construction date can be established and as the prototype of later pagodas with closely stacked eaves.
Foundation under the Northern Wei
In AD 520, Emperor Xuanwu of the Northern Wei converted a mountain residence at Songshan into a monastery called Xianju Monastery. A pagoda was built there in the same year. A record compiled between AD 534 and 549 gives the monastery a variant name, Queju Monastery. The surviving pagoda is dated more specifically to around AD 523, when the Northern Wei supported Buddhist institutions and monument building across northern China.
The tower’s closely spaced eaves, arranged as tightly stacked horizontal tiers, became an influential form in Chinese pagoda architecture. No earlier surviving example of this type has been identified. Its doorways, attached pillars, and decorative forms also preserve marked Indian influence, reflecting the wider development of Chinese pagodas from the Buddhist stupa tradition, a reliquary monument associated with sacred remains.
Renaming and later decline
In AD 602, during the second year of Emperor Wen of the Sui dynasty’s Renshou era, Xianju Monastery was renamed Songyue Monastery. The pagoda subsequently became known as Songyue Pagoda. After the Tang dynasty, Buddhist activity at the monastery gradually shifted to other foundations, including Shaolin Monastery. The complex then declined, and only the pagoda and the mountain gate survive.
The present tower has sometimes been attributed to rebuilding during the Tang dynasty, although that interpretation has also been rejected. Its construction history therefore remains subject to an explicit uncertainty concerning the extent of any later rebuilding.
Investigation and protection
Archaeological and conservation work in the 1980s clarified the monument’s structure and ritual contents. The Henan Institute for the Preservation of Ancient Architecture surveyed the pagoda and its surroundings in 1985 and 1986, discovering the underground chamber. That chamber was cleared in 1988. During comprehensive repairs in 1989, archaeologists also found two chambers inside the finial, the crowning element of the pagoda.
The excavations recovered Buddhist images, reliquaries, relics, architectural fragments, ceramics, and other objects. Together, these finds provide material evidence for the pagoda’s ritual use and construction history. Songyue Pagoda became a National Key Cultural Relic under protection in 1961, among the first group of sites to receive that status. In 2003, Zhengzhou’s municipal legislature adopted regulations protecting the pagoda, the Dengfeng Observatory, and the Shaolin Pagoda Forest. In 2010, the monument became part of the UNESCO World Heritage property Historic Monuments of Dengfeng in “The Centre of Heaven and Earth.” A security-protection project for that wider historic-monument group, including the pagoda, was implemented in 2014.
Remains
Songyue Pagoda is a twelve-sided, closely spaced-eaves tower about 39.8 metres high. From bottom to top, it consists of a platform, tower body, fifteen eaves, and a finial. Except for the finial and parts of the base, it is built of grey bricks laid with clay mortar, producing an overall greyish-yellow appearance. The surviving remains preserve the relationship between the raised platform, the enclosed tower chamber, the exterior tiers, and the sacred chambers below and above the tower.
Platform and tower body
Platform and terrace
The platform follows the tower’s twelve-sided plan. Its sides range from 130 to 173 centimetres wide, and its southern end rises 111 centimetres above ground level. Irregular bricks pave its surface. A brick-paved terrace projects from the southern side, measuring 383 centimetres from east to west, 310 centimetres from north to south, and 90 centimetres high. Its central path is made of bluestone and grey bricks. On the northern side, a passage at the centre of the platform leads toward the former main hall and rises 101 centimetres above the platform surface.
Lower and upper tower
The tower body stands at the centre of the platform. Its lower level is twelve-sided, with an exterior diameter of 10.6 metres, an interior diameter of about 5 metres, and walls approximately 2.5 metres thick. A projecting waist-eave divides the body into lower and upper sections. The lower section is 359 centimetres high, with sides measuring between 266 and 297 centimetres. The waist-eave, 95.5 centimetres high, is formed from layered brick projections, with three parallel brick courses at its outer edge.
Arched doorways on the east, west, south, and north sides pass through both sections of the tower body. Each is 278.5 centimetres high from the waist-eave and 155 centimetres wide. Two layers of wedge-shaped voussoirs and two arch rings frame the openings. Their upper surfaces carry lotus-petal lintels influenced by Indian forms. The lintels project three centimetres from the wall, have scroll-shaped ends and inset bluestone panels, and are flanked near the attached pillars by mortise openings. The other eight sides of the lower body contain tower-shaped Buddhist niches.
The corners of the upper body contain specially shaped octagonal attached pillars. Each is 310 centimetres high. The pillars beside the doorways expose six faces, while the other pillars expose five. Their capitals are about 86 centimetres high and rest on five-petalled inverted lotus forms. Their bases are approximately 27 centimetres high and shaped as inverted-basin pedestals. The four first-level doorways provide access to the internal tower chamber.
Interior chamber
The internal chamber is divided vertically into nine levels. Its base is twelve-sided and begins to taper inward 80 centimetres above the floor, gradually changing toward an octagonal plan. Nine layers of inward-projecting brick eaves crown the interior, with the first layer already fully octagonal. This arrangement creates a rising, narrowing space within the massive brick walls.
Stacked eaves and finial
Fifteen exterior eaves
Fifteen closely spaced eaves rise above the tower body. The first is 152 centimetres high and consists of sixteen layers of projecting bricks and nine layers of reverse projections. A low wall about 43 centimetres high separates it from the second eave. On its southern side, an arched entrance leads into the internal chamber, while the other eleven sides contain false doors. Each door is flanked by a false window.
The higher eaves follow broadly similar forms while narrowing upward and reducing the number of projecting brick courses. The low wall between the fourteenth and fifteenth eaves is only 20.5 centimetres high, giving the upper profile a parabolic outline. The architect Liang Sicheng described this silhouette as unusually graceful. The low walls beneath the fifth, seventh, ninth, eleventh, thirteenth, and fifteenth eaves each contain a southern doorway leading to the internal chamber. The other levels have false doors, and the thirteenth level lacks false windows on its east, west, south, and north sides.
Finial and upper relic chambers
The finial begins with a circular base 30 centimetres high. Its diameter measures 251.1 centimetres at the bottom and 261.1 centimetres at the top. Above it is an eight-petalled inverted lotus, followed by a circular Mount Sumeru pedestal, a stylized Buddhist base representing the cosmic mountain. The pedestal is 39 centimetres high, measuring 133.1 centimetres at the bottom, 124.1 centimetres at the waist, and 145.6 centimetres at the top.
A twelve-petalled upright lotus rises above the pedestal. It supports seven wheel-rings, separated from the lotus by a circular brick-built layer about 161 centimetres in diameter. The wheel-rings are 282.5 centimetres high overall, broader in the middle and narrower at both ends, with gently curved outer profiles and brick-built central shafts. The finial ends in a jewel. During the 1986 repair, the jewel’s surviving height was 57 centimetres, although its upper part was missing. It contained an iron rod through its centre.
The finial base, inverted lotus, Mount Sumeru pedestal, and upright lotus are brick-built and bonded with red clay. One chamber lies inside the wheel-rings, with the base bricks of the fifth ring forming its cover. A second chamber lies inside the jewel.
Underground chamber
Passage and gateway
An underground chamber lies directly beneath the pagoda, with its entrance opening from the internal tower chamber. From outside inward, it consists of a passage, a gateway, and the chamber itself. Before excavation, the outer part of the passage was sealed with rammed earth and covered by a six-centimetre layer of material. The passage is trapezoidal, measuring 120 centimetres wide at its inner end, 140 centimetres at its outer end, and 220 centimetres long. The two ends differ in height by 156 centimetres.
A partly ruined brick sealing wall bonded with red clay stood between the passage and gateway. The passage walls join the gateway walls through 40-centimetre sections of rammed earth. The outer end also has a brick-built wall measuring 180 by 90 centimetres. The gateway was probably double-leaved, although its doors have been lost. Its surviving lintel, jambs, threshold block, and door pivots are made of bluestone, while a wooden support structure stood behind it.
The gateway lintel is round-arched and bears a semicircular carving with a pomegranate motif, symmetrical vine-and-pomegranate designs, and a phoenix on each side. Its face carries three upright lotus flowers, with a pair of mandarin ducks above the central flower. The jambs have curling vine-and-pomegranate designs on their fronts. Each side bears a standing bhikshu, or Buddhist monk, with an inscription identifying the western figure as Chongtai and the eastern figure as Rukong.
Inner chamber and paintings
The inner chamber lies slightly northwest of the pagoda’s centre. It is approximately square, with sides measuring between 204 and 208 centimetres, and its surviving walls are 130 to 150 centimetres high. The walls curve outward, and traces indicate that the chamber originally had a domed roof. White plaster covers the walls and retains severely damaged murals.
Painted capitals occupy the corners, with one-block, three-arm bracket forms above them. The upper east, west, and north walls contain painted bracket sets shaped as inverted-V forms. Plain tie beams and connecting lintels are painted between the capitals. Below these architectural images are figural paintings. The east and west walls are symmetrical, each with four standing figures, while the spaces above the brackets contain one seated figure each. The north wall contains six seated figures. Ink inscriptions survive in one bracket space on the north wall and another on the west wall. The lower 80 centimetres of each wall are vertical, and the floor is paved with grey bricks.
Images and deposited objects
Buddhist images
The 1986 excavation recovered twelve damaged Buddhist images and image fragments. A red sandstone high-relief image of Shakyamuni, the historical Buddha traditionally identified with Siddhartha Gautama, survives without its lower body below the abdomen and without its left hand. Its damaged lotus-petal halo surrounds a figure with a high hair arrangement, double halo, wide-sleeved crossed-collar robe, and raised right hand in a gesture resembling the gesture of fearlessness. A five-line dedicatory inscription dates the image to the fourth year of the Zhengguang era, AD 523.
The finds also include a 13-centimetre-high white-marble Buddha head with blue-painted spiral curls, a damaged face, and red pigment on the mouth. Its style is close to Tang-period sculpture. A separate grey stone Buddha head has a high hair arrangement, damaged forehead, short flat eyebrows, closed eyes, and elongated earlobes, and is also stylistically close to the Tang dynasty.
A limestone seated Buddha survives as a body and Mount Sumeru pedestal. It is 45 centimetres high in its surviving state, with a rounded shoulder line, bare chest, hanging double-collar robe, cross-legged pose, and left arm resting on the knee. A grey stone cross-legged image of Maitreya, the Buddha regarded in Buddhist tradition as the future Buddha, survives as a lotus seat and crossed feet. Other fragments include a crowned red sandstone head, a grey stone bhikshu head, a red-clay bhikshu head with blue-painted eyes, and two grey stone bodhisattva fragments. A bodhisattva is a Buddhist figure who seeks enlightenment while aiding other beings.
Architectural and ritual deposits
The underground chamber also contained a lotus-decorated square brick, a double-lipped flat roof tile, six ceramic ridge-beast sword handles, a dragon-patterned water-drip mould, a dragon-patterned water-drip tile, a triangular fastening tile, and six eave-end tiles. The water-drip tile dates to the Ming or Qing period, while the other architectural fragments date to the Tang or Song periods. Further finds included ceramic fragments from bowls and jars, thirty-three damaged stone carvings, the foot of a sancai incense burner, and a copper coin from the Zhiping era.
The two finial chambers contained additional sacred deposits. The chamber inside the jewel held two white-porcelain dishes, a porcelain relic jar containing a silver pagoda, two white-porcelain gourd-shaped vessels, relics, two silver ornaments, two pieces of crystal, and a glass bottle. The chamber within the wheel-rings held two round wooden rods, a porcelain relic jar containing red, white, and black relics, a porcelain bottle, and a piece of crystal. These upper chambers, like the underground chamber, served to preserve Buddhist relics and associated sacred objects. The innermost chamber also contained Buddhist scripture transcriptions and Buddha images.