Sos Furrighesos Necropolis: A Prehistoric Rock-Cut Burial Site in Sardinia
Site at a Glance
- Popularity
- Low
- Country
- Italy
- Primary era
- Stone Age
- Eras represented
- Stone Age, Bronze Age, Classical, Medieval
- Civilizations
- Unclassified
- Site type
- Burial
- Remains
- Necropolis
On this page26 sections
History
The Sos Furrighesos Necropolis is a prehistoric burial site near Anela in Sardinia, Italy. Its numbered group comprises 18 rock-cut tombs, though the identification of Tomb I is uncertain. Finds place burial activity between the Late Neolithic, including the San Michele culture (3200–2800 BC), and the Early Bronze Age, including the Bonnanaro culture (1800–1600 BC).
Prehistoric use and later changes
The tombs were used across several prehistoric cultural phases. Tomb VI has not been excavated, so its age can be assigned only broadly to the Neolithic or Copper Age, the period between the Neolithic and Bronze Age associated with the use of copper. Finds from Tomb XII point to prolonged use across different cultural horizons. Figurines from that tomb suggest it may have had a specialized ritual purpose.
Tomb IX began as a domus de janas, a Sardinian prehistoric rock-cut tomb. During the Nuragic period, a prehistoric Sardinian cultural phase associated with tower-like stone structures, it was remodeled as a monumental communal tomb known as a ‘Tomb of the Giants’. Its carved stele, an upright stone monument, was made after the underground tomb had been cut, during the Archaic Nuragic period, around 1800–1600 BC.
Excavation of Tomb IX revealed six layers of deposits. The upper layer held ash, charcoal, a terracotta jug, a small bowl and iron tools, associated with a later emptying of the tomb. Lower deposits included obsidian and flint flakes and blades, as well as pottery fragments, some dating to the Roman period. The finds reflect repeated activity at the tomb beyond its prehistoric use.
Discoveries and modern recognition
In the early 1990s, waterlogged ground caused the sides of Tomb XV’s access trench to collapse, exposing incised designs at its entrance. Objects recovered from spoil piled outside the tomb probably came from an earlier emptying and represent several cultural horizons. Tomb XVIII, partly buried between Tombs II and III, was discovered in 1982.
In 2025, the necropolis became part of the UNESCO World Heritage property ‘Funerary Tradition in the Prehistory of Sardinia – The domus de janas’, under cultural criterion iii.
Remains
Setting and general layout
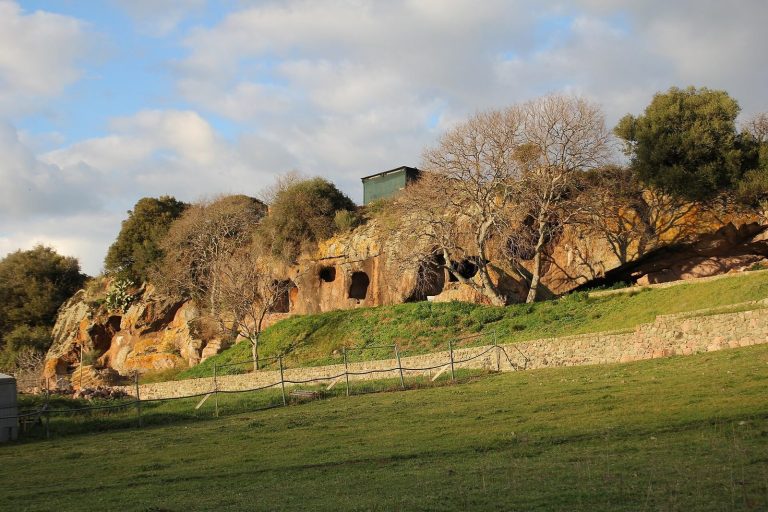
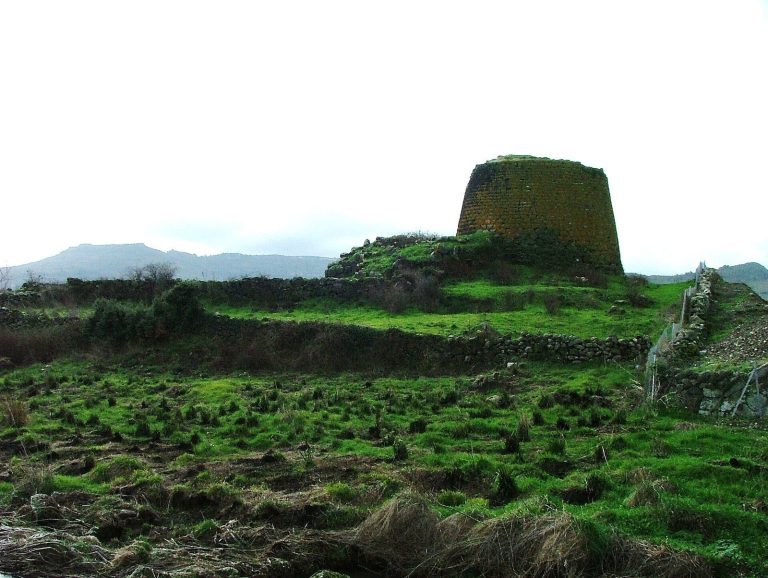
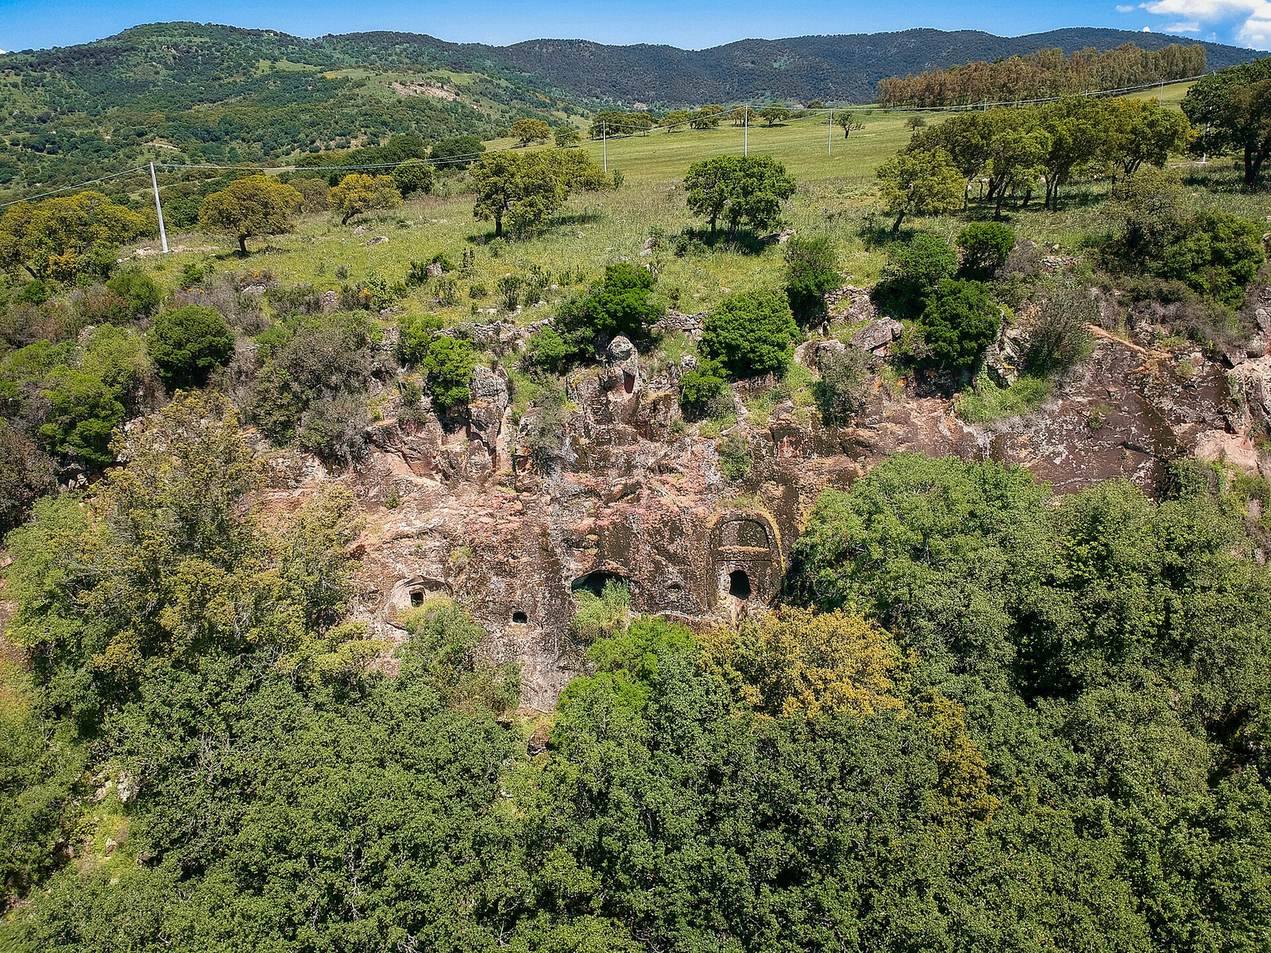
The necropolis occupies the southern face of the Pianu Oschiri volcanic plateau, overlooking the Tuvu ’e carru stream. Its rugged surroundings include hills, small plateaus and steep trachyte escarpments above narrow valleys. The rocky slope rises about 20 m above the valley crossed by the Buttule stream, near its meeting with the Rio Mannu, and lies more than 8 km northwest of Anela. Most tombs are cut into trachyte, a volcanic rock; Tomb XV is the exception. Entrances are generally elevated and arranged in three roughly parallel horizontal rows. Tombs I, IV, V, XII and XVIII open at the escarpment’s base; Tombs II, III, VI–XI and XIII–XIV begin about 0.60–3 m above ground, while Tombs XVI and XVII open around 20 m above today’s ground level. Tomb XV stands apart at the plateau’s edge. Rock-cut notches gave access to some raised entrances, which were closed with wooden or stone doors. Channels across some thresholds and grooves cut above entrances helped manage rainwater and spring runoff. Near the southwestern edge are remains of a partly destroyed nuraghe, a tower-like stone structure, and circular huts. Near the plateau’s center, abundant obsidian and flint debris marks a stone-working area.
Tombs I–V
Tomb I
Midway up the escarpment near Tomb II, two cavities show areas worked by rotary motion and by striking the rock. Farther southeast, a large niche is overgrown with brambles. At ground level, the upper edge of a blocked opening may belong to a tomb or to an abandoned attempt to quarry the rock; the identification of Tomb I remains uncertain.
Tomb II
This shallow tomb is partly collapsed. A rock-cut approach trench, 2.50 m long, has stair-like notches. Above its entrance, a deep V-shaped groove outlines a gable-like front and continues down both sides; a similar gable motif appears on the rear wall of the antechamber, where a horn-shaped carving emphasizes the design. The entrance opens into an elliptical antechamber measuring 1.72 by 0.72 m and 1.50 m high. Its side walls slope inward, and its floor and ceiling are slightly concave. The almost oval doorway has been altered, and its hexagonal inner opening was enlarged later. A horizontal band and raised strip decorate the left wall, while the right wall contains two cavities.
The principal chamber, B, is roughly rectangular, 4.10 m long at the entrance end and 3 m at the rear, with a depth of 1.58 m and a height of about 1.30 m. Its ceiling rises slightly in a dome. Moulding marks the junction between the walls and ceiling. A false door, a carved representation of a doorway rather than a usable passage, occupies the rear wall, framed by shallow raised bands and further horizontal lines. The entrance wall repeats the surrounding composition symmetrically.
Chamber C lies beyond a rounded, trapezoidal doorway raised 10 cm above the floor. It has a semi-ellipsoidal form and measures up to 1.16 m wide, 1.30 m deep and 1.25 m high. A cavity about 0.80 m deep lies where its ceiling meets the rear wall. A second semi-ellipsoidal space, C′, measures up to 0.94 m wide and 1.30 m deep; together the two form a double-lobed space. Chamber D is reached over a transverse step 0.66 m high, through a trapezoidal doorway with a cornice-like incision. It measures 1.37 by 0.76 m and is 1.05 m high. Two opposing trapezoidal funerary benches flank the chamber, and two raised bands divide its flat ceiling lengthwise.
Tomb III
A large rockfall separates Tomb III from Tomb II, and collapse and later interventions have heavily damaged it. The tomb comprises a ruined antechamber, central chamber B and five side chambers. Chambers C and D lie to the left of B; E, F and G form a row on the right. A trench with rock-cut steps leads to the antechamber, which measures 3.10 by 0.65 m and has lost most of its ceiling. Chamber B is nearly rectangular, 3.33 by 1.92 m, with rounded corners, a slightly concave rear wall and an uneven ceiling that dips at the center and rises toward the corners. Its maximum height is 1.62 m.
Chamber C opens toward the valley like a covered terrace, though its outer wall has collapsed. This irregular, damaged space reaches 2.35 m in depth; its threshold is 0.78 m wide and 0.85 m high, and sits 0.80 m above ground. A rebate runs along the threshold. Four notches, each smaller than the one above, lead to irregularly circular chamber D, which is 1.62–1.97 m wide and 0.82 m high. Chamber E has an irregular plan, with a trapezoidal central area 2.13 m wide and 1.58 m deep.
Chamber F is quadrangular, measuring 1.33 m wide, 0.73 m deep and 1.45 m high. Chamber G can be reached from F or from outside by rock-cut notches. Its 1.45 m-wide opening faces the valley. The roughly quadrangular chamber is 2.50 m wide, 0.90 m deep and 1.00 m high.
Tomb IV
A rock block obstructs the entrance to Tomb IV. The visible remains suggest a single chamber with a trapezoidal plan.
Tomb V
Tomb V has a single trapezoidal chamber. Its entrance is 0.58 m high and 1.55 m wide at the base. The chamber is 1.55 m long, up to 1.14 m deep and now 0.58 m high. Marks left by a toothed cutting tool remain on the carefully worked rock surface.
Tombs VI–XI
Tomb VI
The entrance opens about 3 m above the present ground. Its semicircular antechamber measures 1 by 1.64 m and is 0.85 m high, with a barrel-shaped vaulted ceiling. A raised frame surrounds the entrance to the main semicircular chamber, which is 1.85 by 2.43 m and 0.70 m high. Above the doorway is a carved bull’s head, 0.40 by 0.26 m, with distinct horns, head and ears. Red paint survives on the carving and on a band where the wall meets the ceiling. A raised, four-sided frame on the rear wall forms a false door measuring 0.61 by 0.45 m.
Tomb VII
Like Tomb VI, this tomb opens about 3 m above ground. A raised frame surrounds its rectangular doorway, which is 0.60 m wide, 0.58 m high and 0.125 m deep. Beyond it, a semicircular antechamber measures 1.28 m deep and 1.73 m wide, with 1 m of height above the fill. The ellipsoidal chamber is 2.30 m wide and 1.12 m deep, with 0.77 m of height above the fill. Excavation recovered pottery fragments from large vessels, a flint scraper and blade, and river pebbles.
Tomb VIII
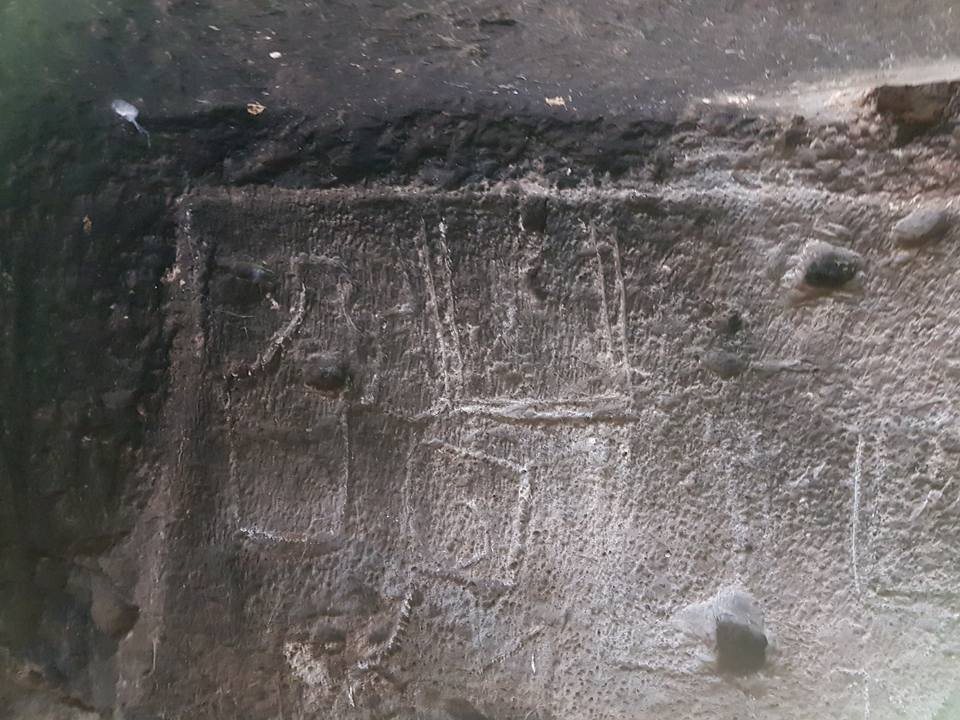
The tomb has a complex plan, with a vestibule, a large decorated chamber B, a smaller raised space C and a deep chamber D opening from a platform. Pecked designs cover parts of chamber B’s walls, about 0.40 m above the floor on the rear wall and 0.70 m above it on the entrance wall. Some were reworked with metal tools during later interventions. The arrangement centers on a principal motif and is framed above by moulding and on the right by a vertical line. Arcs, including semi-ellipses, and open-ended rectangles are common. The marks are crowded and sometimes overlap on the left; on the right they are fewer and larger, with some worn away by erosion. Soot from later pastoral fires darkens parts of the walls, contrasting with pinkish rock where the surface is flaking or protected by the engravings.
Tomb IX
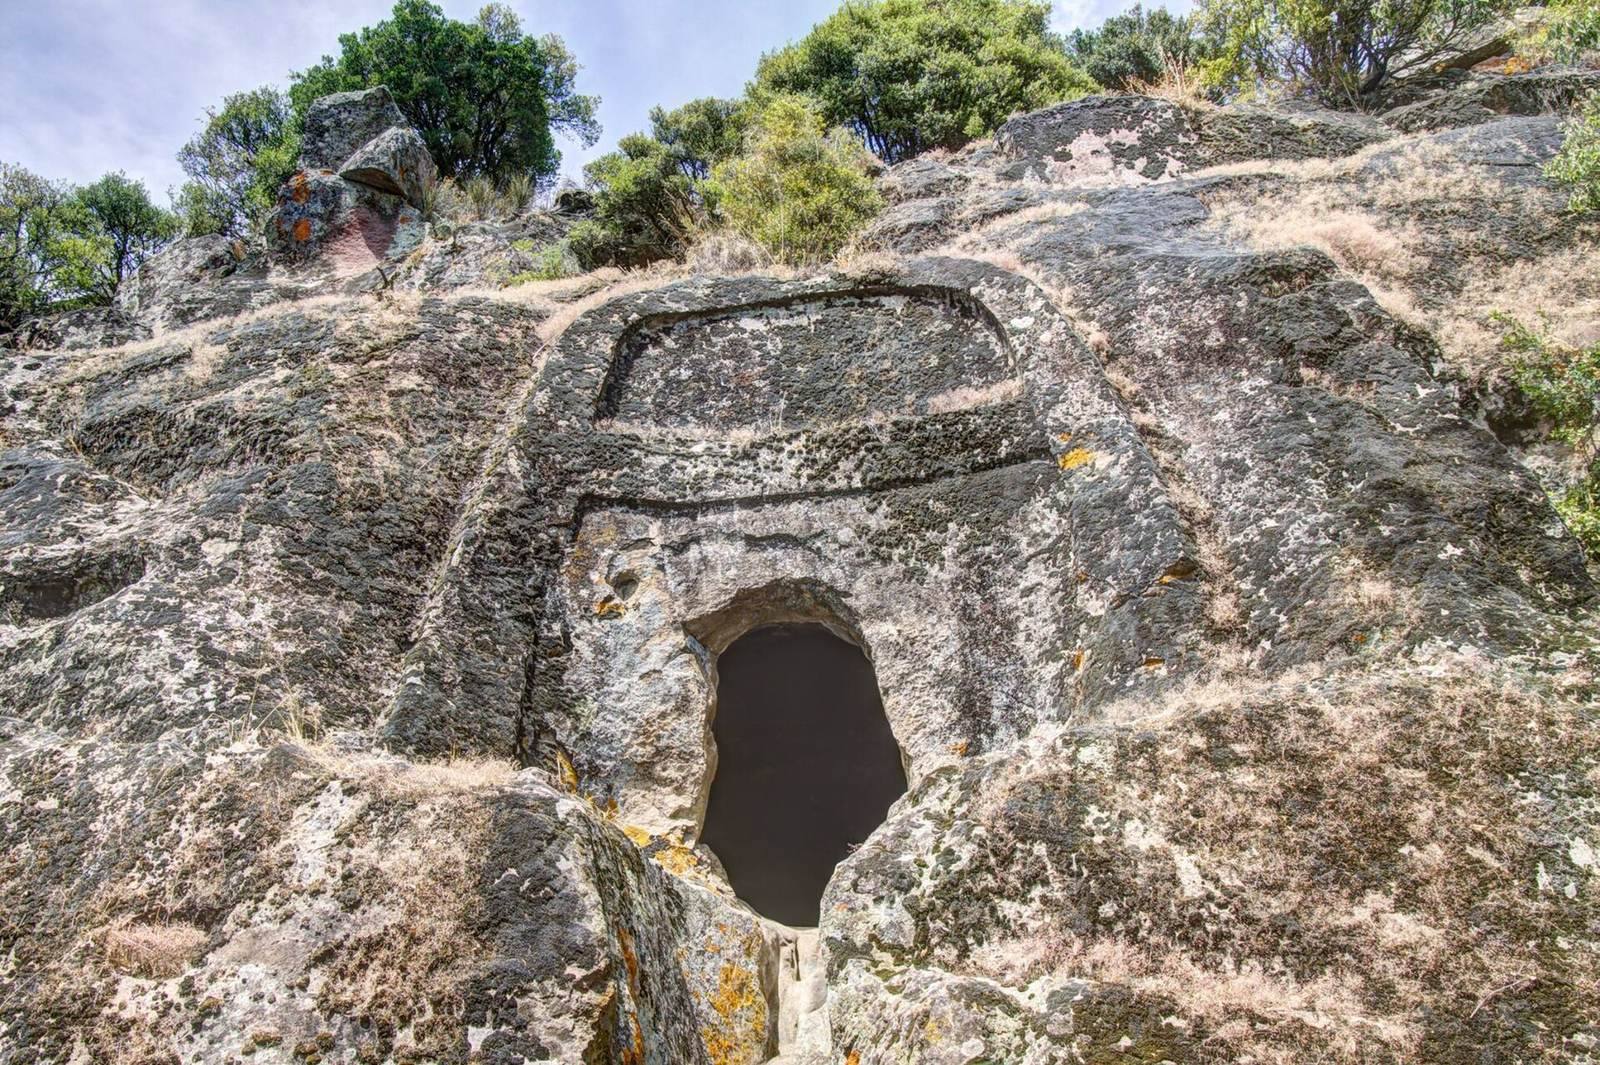
Known as Sa Tumba de su Re, meaning ‘the King’s Tomb’, Tomb IX has an ascending entrance passage 2.50 m long and 0.65–0.90 m wide. Small steps in the passage are worn by water runoff. The façade was cut deeply into the rock. Archaeologist G. Tanda proposed that this work destroyed the original antechamber. The rock face is shaped as an arched stele, and a deep incision gives the form of a symbolic semicircular recess. Archaeologist Castaldi proposed that such a recess may instead have stood lower down, at the foot of the rocky step, where a deep central cut with steps leads toward the tomb.
The stele is about 4.1 m high, 4.0 m wide at its base and 2.60 m wide at the top. A raised moulding frames an arched upper panel and a roughly trapezoidal lower one. The upper panel is 2.45 m wide at the base and 1.30 m high; the lower panel measures 2.90 m across the base, 2.60 m across the top and 2.10 m high. Three cavities at the top held three small sacred pillar stones, or baetyls, found in place. The cavities measure 0.42 by 0.36 by 0.32 m, 0.30 by 0.28 by 0.20 m, and 0.28 by 0.27 by 0.18 m deep.
Successive reuse enlarged the entrance, which is now a breach 0.85 m wide and 1.55 m high. Inside, a single transverse rectangular chamber measures 4.05 by 2.20 m and 1.65 m high. Small platforms on either side stand about 1 m above the floor. The left platform measures 2.30 by 1.85 m and is 0.80 m high; the right is 2.30 by 1.77 m and 0.70 m high. A central raised strip on the right continues down the lower step wall.
Engravings made by pecking, polishing or both cover the walls and ceiling. Their forms include comb-like marks, open rectangles, grids, zigzags, star-like shapes, stylized animals, abstract patterns and tree-like figures sometimes described as ‘fir-tree people’. Among the recognizable images are a highly stylized bovine, a deer with a swollen belly and branching antlers, an anthropomorphic figure 40 by 36 cm, and a double axe that has since been destroyed. Naturalistic and abstract designs generally appear in separate groups, though some overlap. Their proposed dates range from the Abealzu-Filigosa culture through the Bronze Age, with other engravings assigned to the Roman or Early Medieval period.
Tomb X
A 2.40 m-long access trench, about 0.40 m wide, has six rock-cut steps. It leads to a four-sided antechamber 1.26 m wide and 0.58–0.96 m deep, then to a single ellipsoidal chamber measuring 3.00 by 1.88 m and 1.09 m high. The chamber entrance has been enlarged, and a channel for runoff runs above it.
Tomb XI
Thirteen steps lead to a trapezoidal antechamber, 1.55 m wide at its broadest point, 1.15 m at its narrowest and 1.10 m high. The roughly trapezoidal main chamber measures 3.40 by 1.75 m and 1.28 m high, with an oven-shaped vault. The antechamber’s left wall has a grid-like linear design covering its height and three overlapping groups of engravings; two very faded motifs remain on the right wall. Traces of red paint survive on a decorative moulding above the chamber entrance.
Engraved groups of rectangles appear above a large linear grid on the chamber’s left wall; the right wall carries a group of open rectangles. Their sharply defined lines were pecked into the rock with a stone tool that had a convex tip.
Tombs XII–XVIII
Tomb XII
Part of a probably semicircular chamber survives, a rare plan at this necropolis. Two red-painted raised bands remain on the surviving wall. The left measures 67.5 cm high and 12.5–16 cm wide; the right is 60 cm high and 12–16 cm wide. A raised moulding at the base is about 12–13 cm high. On the floor, 60 cm from the rear wall, four incised circles, 38, 35.5, 24 and 8.5 cm in diameter, surround a central cup-shaped mark 8.5 cm across and 1 cm deep.
Traces of clay figurines, each about 10.5 by 9.5 cm, were visible to the right; some are now held at the G. A. Sanna Museum. Excavation recovered an obsidian flake and 86 pottery fragments. Of these, 29 were assigned to the San Michele culture, one to Monte Claro, and 10 came from a single Bell Beaker vessel.
Tomb XIII
After a fire, the rock face above Tomb XIII collapsed. The damage makes its precise plan difficult to establish. The tomb has an antechamber and four chambers, two roughly quadrangular and two trapezoidal.
Tomb XIV
At the eastern end of the rock face, Tomb XIV retains its overall form, although its surfaces and floors are damaged. A decorated doorway leads into a semicircular antechamber measuring 1.25 by 0.40 m and 0.90 m high. The roughly trapezoidal chamber beyond measures 2.60 by 1.40 m and is divided into three spaces. Five small pits mark the central space; a final space to the left, 1.33 by 0.75 m, is separated by a half-wall.
Tomb XV
Set apart at the edge of the Pianu Oschiri plateau, Tomb XV has a badly damaged antechamber and a rectangular chamber. The antechamber was probably semicircular and survives to a height of only 30 cm. Holes near the entrance mark an earlier closing device, and traces of red paint remain on the doorway to the chamber. The chamber measures 6.65 m wide, 2.10 m long and 1.22 m high. Three rectangular zones divide its interior: a left area measuring 1.80 by 2.15 m, a right area 1.50 by 2.34 m, and a narrower central area.
The collapse of the access trench exposed three pecked designs at the entrance. An anthropomorphic figure is to the right of the doorway, while two heavily degraded, unidentifiable motifs lie to the left. Finds from the spoil included 43 pottery fragments assigned to the San Michele, Filigosa, Monte Claro, Bell Beaker and Bonnanaro horizons, along with three stone objects.
Tomb XVI
Small notches cut into the steep rock provide access to this partly buried tomb. Its doorway is damaged, especially along the right side and upper edge, and measures 1.66 m wide and 0.45 m high. The roughly trapezoidal chamber is 2.10 m wide, 1.18 m deep and 0.90 m high.
Tomb XVII
The entrance and entrance wall have been destroyed, leaving an opening 3.70 m wide and 0.99 m high. The irregular main chamber measures 3.70 m wide and 1.95 m deep. On the left, a raised niche sits 0.40 m above the fill. It has a rectangular opening and an almost ellipsoidal interior. A secondary trapezoidal chamber lies to the right, entered through a four-sided doorway. It measures 0.80–1.90 m wide, 1.85 m deep and 0.65–0.75 m high. A pit in the floor on the right measures 1.40 by 0.78 m.
Tomb XVIII
Discovered between Tombs II and III, Tomb XVIII is partly buried. Its badly damaged antechamber is 1.20 m wide, with 0.60 m of height above the fill; part of its pitched roof remains. The kidney-shaped chamber measures 3.10 m in diameter, 1.38 m deep and 1.04 m high.