Chesters Bridge: Roman Crossing of Hadrian’s Wall in Britain


Site at a Glance
- Rating
- 4.8
- Popularity
- Very Low
- Country
- United Kingdom
- Primary era
- Classical
- External website
- Open
- Eras represented
- Classical
- Civilizations
- Roman
- Site type
- Military
- Remains
- Fortified Bridge
On this page11 sections
History
Chesters Bridge is a Roman bridge in the United Kingdom at Chollerford, built to carry Hadrian’s Wall across the River North Tyne during the second century. The crossing connected the two sections of the frontier barrier interrupted by the river, while the Wall’s patrol walkway continued across its deck. The bridge stood about 120 metres east of the cavalry fort at Chesters, identified with the Roman fort of Cilurnum or Cilurvum, and formed part of the wider military system controlling movement along northern Britain’s frontier.
Construction of Hadrian’s Wall
Emperor Hadrian ordered the frontier barrier in 121 or 122 in response to the threat from northern tribes. Construction began in 123, and the design was altered from 124 to include narrower wall sections and major forts such as Chesters. The work was complete before 127. Around Chollerford, the Sixth Legion began building the Wall about 124, although the fortifications were probably not finished before 126. Construction of the bridge itself probably began no earlier than 125.
The fort at Chesters defended the crossing, first with cavalry and later with infantry. An altar inscription found in 1978 names the earliest known unit there as the ala Augusta ob virtutem appellata, an auxiliary cavalry regiment named Augusta because of its valour. The bridge also carried the Military Way, the Roman military road associated with Hadrian’s Wall. An earlier route, the Stanegate between Corbridge and Carlisle, crossed the North Tyne more than 800 metres downstream, probably at a ford or on a wooden bridge.
Rebuilding and continued use
The first crossing, conventionally called Bridge I, belonged to the initial Hadrianic building campaign. Preparation may have started during the first or second phase of Wall construction, around 122 or 123, but the bridge itself probably followed no earlier than 125. It may have remained in use until the later second century.
Hadrian’s Wall was temporarily abandoned in the 140s when the Roman frontier moved north to the Antonine Wall, a later barrier built across central Scotland. After that frontier was abandoned, Hadrian’s Wall was reoccupied in 163. Bridge I was probably dismantled or replaced during this military reorganization. Bridge II is generally assigned to the early third century, although proposed dates include 162–165, around 192, and 206. The replacement was much larger and was intended to carry a road carriageway as well as the Wall’s route.
Bridge II was maintained into at least the early fourth century and probably remained in use until the end of Roman rule. Coins from the second half of the fourth century and pottery from the western approach ramp indicate that it remained intact into the early fifth century. Later changes included work on the eastern abutment, an approach ramp, and a water channel, but no further major repairs or alterations are known after the bridge’s main construction.
Decline, reuse, and investigation
After Roman rule ended, the bridge deteriorated in successive stages and was probably unusable by the thirteenth century. A medieval stone bridge was then built farther north at Chollerford, at an established crossing point. Much of the Roman bridge was dismantled for building material, probably including systematic demolition around 670 for the construction of St Wilfrid’s church or monastery at Hexham. Lead associated with the iron cramps may have amounted to as much as eight tons and was later reused for the church roof. Darker bridge stones remain identifiable in the crypt of the former monastic church, and at least one probable bridge block was reused in the eleventh-century church at Warden.
The first descriptions of the remains date from the late sixteenth century. Camden mentioned the bridge in 1695, and Gordon gave a detailed description in 1726, when only foundations remained and these were chiefly visible at low water. A plan of the visible remains appeared in 1851. William Coulson’s excavations from 1860 into early 1863 exposed the eastern abutments of both bridges and included work in the riverbed. Bridge I was initially assigned to the period of Agricola because Hadrian’s Wall was then incorrectly dated.
Frank Gerald Simpson investigated the site again in 1946, after vegetation and deterioration had obscured and damaged the remains. His work helped associate Bridge I with the first phase of Hadrian’s Wall rather than with an earlier Agricola-period structure. A major excavation and restoration programme began in 1982 after further damage caused by increasing visitation. The first season inventoried the surviving stones. In 1983, blocks piled over the remains during the Victorian period were removed, and excavation on the eastern bank exposed an approach ramp and a tower. Work by Paul Bidwell and Bill Griffiths on the western bank in 1990–1991 confirmed a second approach ramp and western tower. Further bridge remains were recovered from the river in 2003.
The form of Bridge II remains debated. Stone voussoirs and other architectural elements found during the 1980s supported an interpretation of a stone superstructure. A reinterpretation published in 2024 instead proposed that the bridge was largely wooden, reassigned the worn cornice stones to a southern abutment interpreted as a wharf, and viewed the site as a Roman logistics base and the head of navigation on the North Tyne. The construction and function of the upper structure therefore remain unresolved.
Remains
Setting and surviving layout
The bridge crossed the North Tyne about four kilometres upstream from its confluence with the South Tyne. The modern river is about 50 metres wide at the crossing and generally less than 1.5 metres deep. It now runs 15–20 metres farther west than it did in Roman times. The ancient channel approached from the northeast and turned more sharply toward the southeast at the bridge. This change left the eastern abutment above the present riverbank, while erosion, undermining, silting, and the altered channel destroyed or covered much of the western side. At low water, parts of the western abutment and two central pier foundations can be seen. The surviving eastern abutment of Bridge II and its associated tower are also preserved.
The crossing stood within a defended section of Hadrian’s Wall. The fort at Chesters lay about 120 metres to the west, and a small fortlet, a minor fortified installation, stood approximately 250 metres west of the eastern abutment. The Wall’s ditch and vallum, a substantial earthwork behind the Wall on its southern side, formed part of the surrounding frontier landscape.
Bridge I
Bridge I was approximately 61 metres long and about 3 metres wide, matching the Broad Wall used in this sector during the first phase of Hadrian’s Wall construction. At least eight, and possibly nine, hexagonal stone piers stood about 4 metres apart between two abutments. Each pier was about 6 metres long and 3 metres wide, with a pointed cutwater, a projection designed to divide and deflect the river current, generally about 1.5 metres long and set at roughly 45 degrees. The easternmost span was approximately 4 metres wide, and the first pier from the east survives within the later eastern abutment. Dressed stone blocks were joined with iron dovetail cramps set in lead. The superstructure may initially have been wooden, although a stone deck carried on small arches is considered probable, with reconstructions proposing as many as nine arches.
Bridge II
Piers, arches, and masonry
Bridge II was approximately 57.6–58 metres long, about 6 metres wide, and approximately 7.15 metres high. Three large river piers, regularly spaced about 10.4–10.8 metres apart, carried four arches. Each pier was approximately 5 metres wide and 9.3 metres long, with pointed cutwaters. The bridge was built in carefully laid squared masonry, using nearby sandstone probably quarried within 2.5 kilometres at places including Black Pasture and Fallowfield Fell. Close-fitting joints used carefully dressed margins, and large blocks retain Lewis holes, lifting sockets for cranes. Long iron ties set into channels reinforced the facing.
Surviving arch voussoirs, grooved cornice blocks, parapet slabs, and moulded angled members have been associated with a stone upper structure. The proposed design included stone parapets on moulded cornices and free-standing columns at intervals. The columns may have supported statues, although that interpretation is uncertain. The 2024 reconstruction instead places the cornice stones in a southern wharf and considers much of the bridge above the supports to have been wooden.
Abutments, towers, and approaches
The eastern abutment was massive and projected about 7 metres into the river. Its base included a central section with angled wing or quay walls extending north and south to protect it from the current. The northern quay wall survives to its full height and carries a carved male fertility symbol intended to avert misfortune. The southern part of the abutment was enlarged for an approach ramp. A water channel passed through the floor of the eastern tower and ramp and supplied a watermill south of the bridge.
Towers or gatehouses measuring approximately 6 by 6 metres stood at both ends of Bridge II and controlled the crossing. They were later removed and replaced by approach ramps about 9 metres high. These ramps allowed wheeled vehicles to cross and helped protect the abutments from flood erosion. Quay walls also reinforced the banks north and south of the eastern abutment. The western abutment has largely been destroyed by the river’s movement. Parts of its former tower survive, while rubble from the approach ramp lies on the slope behind it, and the small amount of surviving material reflects prolonged quarrying of the ruins.
Connections with the Wall
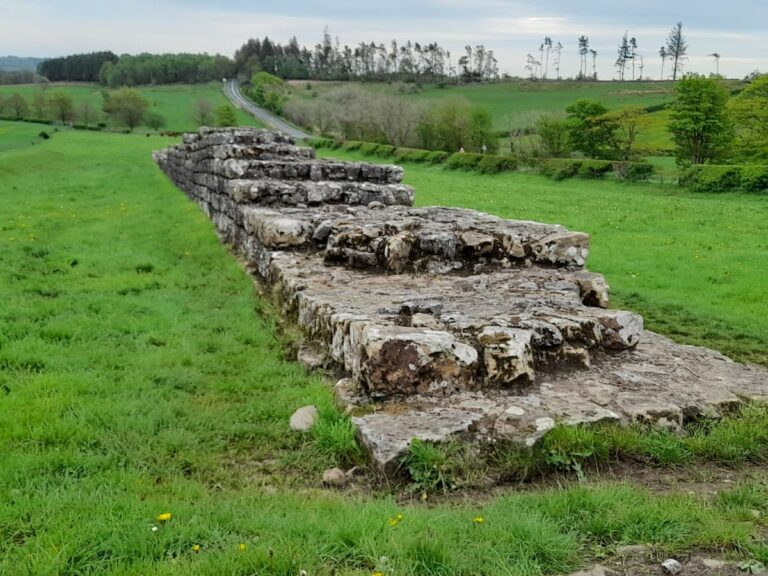
Hadrian’s Wall continues on both sides of the river. Its surviving base is approximately 3.30 metres wide, showing that this stretch began as part of the Broad Wall phase. The broad foundation was probably only a few courses high before becoming the base for a narrower wall about 2.10 metres wide. On the eastern bank, the Broad Wall ends about 8.5 metres from the estimated position of Bridge I’s abutment. The narrower wall continues beyond it on a slightly different alignment, and its final metres were largely rebuilt when Bridge II was constructed.