Pyramid of Senusret II: A Middle Kingdom Royal Tomb at El Lahun
Site at a Glance
- Rating
- 4.5
- Popularity
- Low
- Country
- Egypt
- Primary era
- Bronze Age
- Eras represented
- Bronze Age
- Civilizations
- Egyptian
- Site type
- Burial
- Remains
- Pyramid
On this page17 sections
History
The Pyramid of Senusret II is a royal funerary monument at El Lahun in Egypt, built by the Twelfth-Dynasty pharaoh Senusret II in the early nineteenth century BC. The ruler belonged to the Twelfth Dynasty, a royal house of the Middle Kingdom associated with the centralization and cultural revival of ancient Egypt. The pyramid stood near the entrance to the Bahr Yusuf canal in the Fayyum region, where Senusret II is associated with the cultivation of former marshland in the Fayyum Basin.
The pyramid complex and its town
The pyramid complex was supported by a purpose-built settlement whose ancient name was Hetep Senusret, meaning “Senusret is at peace” or “Senusret is contented.” The settlement is now generally called Kahun or El Lahun. As a pyramid town, it housed personnel and supported the religious and administrative activities of the royal complex. It remained active into the Thirteenth Dynasty and included an acropolis, large residences in its eastern quarter, and more modest housing in the west.
Many residents of Asiatic origin lived in the town during Senusret II’s reign, and their population grew during the Middle Kingdom. Hundreds of papyri found there concern literary, mathematical, medical, and legal subjects. Together with the surviving urban layout, these archives provide evidence for ancient Egyptian town planning and for the organization of life around a royal mortuary institution.
The name of the pyramid itself remains uncertain. The pyramid district, including its mortuary and cult installations, was called Sekhem Senusret, meaning “Senusret is powerful.” The name Khai Senusret, meaning “Senusret shines,” was once assigned to the monument, but it was later identified as the name of the pyramid town of Senusret I at Lisht.
Design and royal burial
The complex followed Old Kingdom models in its subsidiary installations while introducing an unusual strategy for protecting the royal burial. Instead of placing the true entrance beneath the customary north chapel, its entrance was concealed on the southeast side of the pyramid, beneath the tomb of a princess. A shaft approximately 16 metres deep led toward the royal burial apartments. The concealed arrangement appears to have been intended to deter tomb robbers.
The initial shaft associated with the burial rites was too narrow for the movement of the sarcophagus and construction materials. A larger construction shaft was therefore cut beneath Tomb 10. This arrangement allowed the builders to complete the underground chambers while keeping the principal entrance hidden beneath the princess’s tomb.
The pyramid’s fine white limestone casing was plundered during the Nineteenth Dynasty. An inscription discovered by Flinders Petrie indicates that Ramesses II quarried the casing for his own building projects, while graffiti from his reign show that the complex was being exploited as a stone quarry. The mortuary temple on the east side was destroyed during the same reign, and the valley temple was also destroyed. Its substantial distance from the main complex has led to the suggestion that it may not have been physically connected to it.
Excavation and interpretation
Modern investigation began with documentation by Dominique-Vivant Denon during the French expedition to Egypt and by John Shae Perring in the nineteenth century. Karl Richard Lepsius visited and briefly surveyed the pyramid in the 1840s. Flinders Petrie conducted the first extensive excavations in the late 1880s and around 1890, locating the concealed entrance, examining the underground chambers, and excavating much of the pyramid town.
Petrie returned to the area in 1914, 1920, and 1921. His work in the royal and subsidiary tombs recovered evidence of ancient looting, later reuse, and royal funerary equipment. Tomb 8 was later excavated by Petrie and Guy Brunton in the early 1910s. Since 1989, a Royal Ontario Museum team led by N. B. Millet and working with architect J. E. Knudstad has investigated the pyramid and town. Work in the 1990s sought architectural details that Petrie had not recorded, while excavation and recording continued in the town and around the pyramid superstructure.
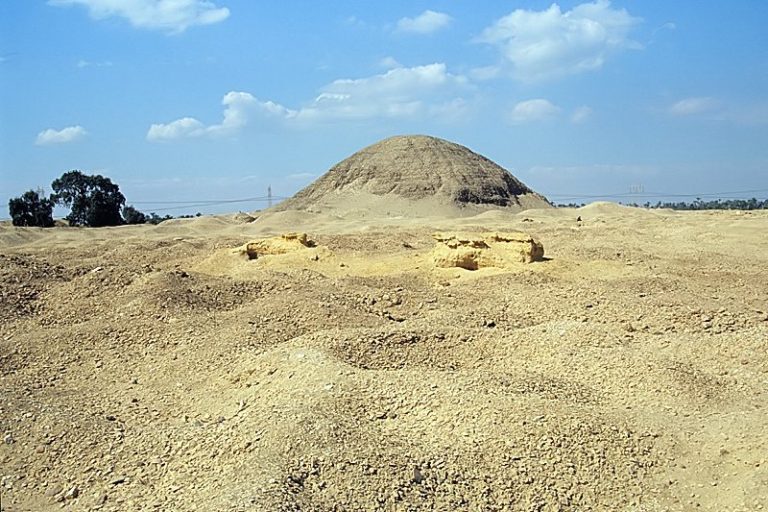
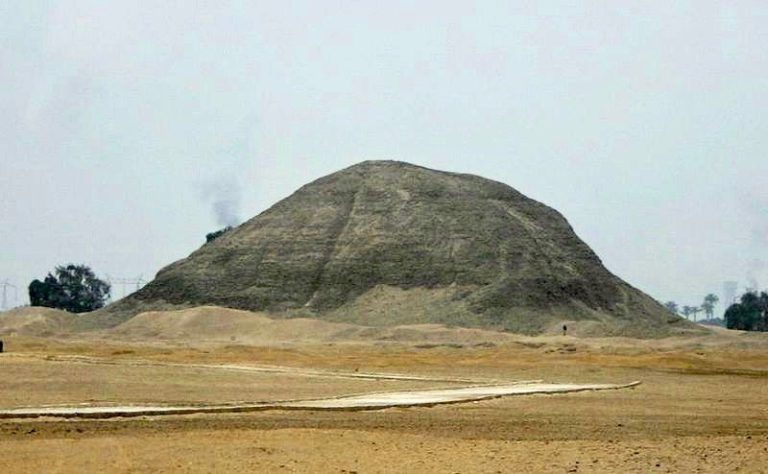
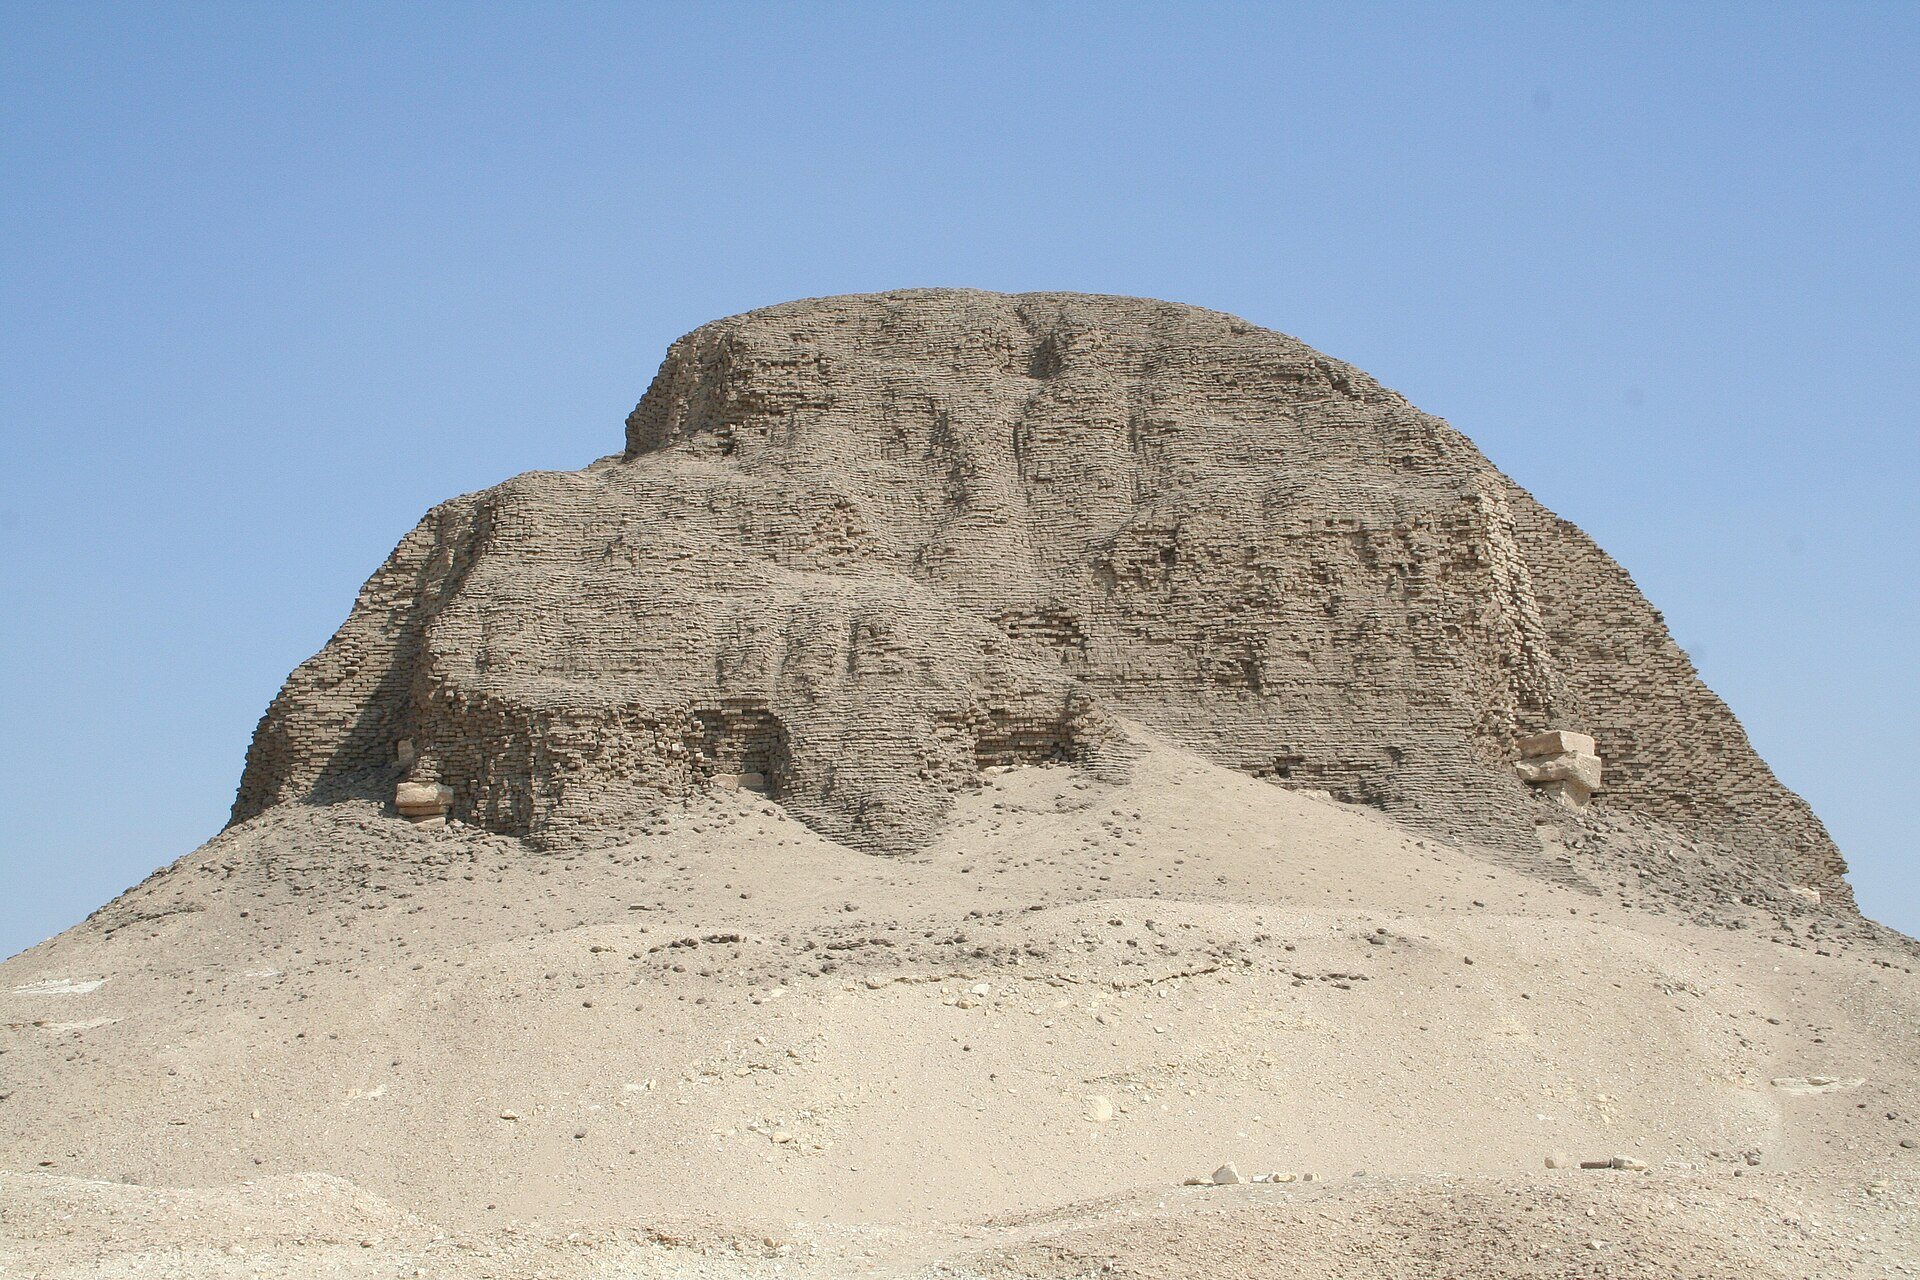
The complex is now highly ruinous. The removal of its limestone casing exposed the weather-sensitive mudbrick core, but surviving architectural elements and excavated objects continue to provide evidence for Middle Kingdom pyramid construction and royal funerary practice.
Remains
The pyramid and outer complex
The pyramid was built over and around a yellow limestone outcrop approximately 12.2 metres high. The outcrop anchored the superstructure and reduced the time and cost of construction. The core was formed mainly from mudbrick arranged around a limestone framework. Retaining walls extended toward the corners, with additional parallel walls between them, creating cavities that were filled with mudbrick. Another part of the structure took the form of a stepped limestone mass with a limestone skeleton and mudbrick filling.
The base measured approximately 106 metres at ground level and 107 metres at the level of the casing trench, about 0.66 metres below ground level. The sides rose at approximately 42 degrees 35 minutes, and the original height was about 48.6 to 48.65 metres. Fine white Tura limestone, a high-quality stone quarried near ancient Memphis, originally covered the exterior. The casing was set into a trench cut into the bedrock, which helped stabilize it against collapse caused by rain. Extensive fragments remain, particularly around the east face and among the exposed masonry.
A black-granite pyramidion, the small pyramidal cap placed at the summit of a pyramid, crowned the monument. Only traces survive. A sloping, sand-filled drainage trench surrounded the pyramid and was designed to absorb rainwater and protect the underground chambers from flooding. Its short limestone perimeter wall carried deep niches modeled on the enclosure wall of Djoser’s Step Pyramid.
Enclosures and cult buildings
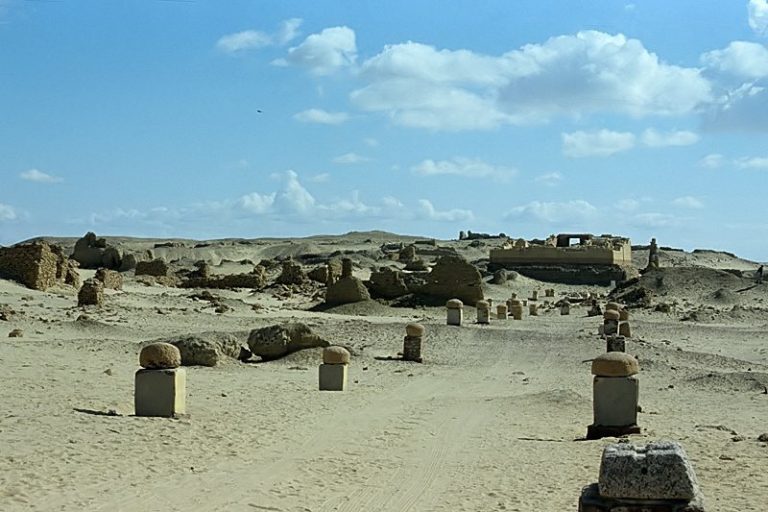
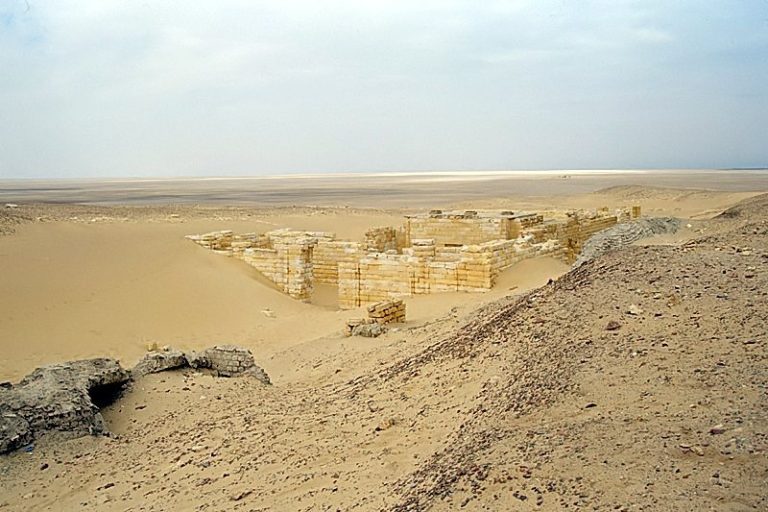
The complex included a recessed or niched stone enclosure, an outer mudbrick enclosure, a north chapel, an east-side mortuary temple, an open causeway, a distant valley temple, subsidiary tombs, mastabas, and a small subsidiary pyramid. A row of trees formerly bordered the enclosure. The mortuary temple yielded fragments of reliefs showing the king, inscriptions bearing his name, painted wall fragments depicting offerings, and red-granite architectural pieces with hieroglyphs painted green. An inscribed block of grey granite may have come from an altar. Two apparent foundation deposits containing pottery lay near the temple’s southeast corner and along its east-west axis.
A broad open causeway extended from the complex, while the valley temple lay approximately 1 kilometre to the east. The plan of the valley temple has not been recovered. Eight mastaba tombs, rectangular flat-roofed tombs with sloping sides, stood north of the pyramid for officials who served during Senusret II’s reign. They were built around limestone cores with mudbrick. A large underground tomb numbered 621, also north of the complex, may belong to a ruler of the Thirteenth Dynasty.
Subsidiary pyramid
A small subsidiary pyramid stood at the northeast corner of the complex. Its base measured approximately 27.6 metres and its former height was about 18 metres. Its underground chambers remain unexcavated, so its role as a queen’s pyramid or cult pyramid remains uncertain.
The concealed royal apartments
Tomb 10 and the hidden entrance
Tomb 10 masked the construction entrance to the royal apartments. It was reached through a shaft 8.64 metres deep and contained an antechamber with partly limestone-faced and partly rock-cut walls, a statue niche, a sloping pavement, a limestone-lined burial chamber, a canopic recess to the east, and an offering chamber to the northeast. Finds included a red pottery bowl, possible calf bones, fragments of a wooden coffin, and a green-feldspar scarab.
A secondary shaft in Tomb 10 opened into a long north-south corridor approximately 18.6 metres long, 2.13 metres wide, and 1.22 metres high. Its ceiling was vaulted. Robbers cut through a corner wall to bypass the limestone blocking, showing how the concealed route was eventually penetrated.
Entrance and passage chambers
The entrance chamber lay approximately 16 metres below ground and measured about 3.35 metres north-south by 5.28 metres east-west. It led to a recessed well room measuring approximately 2.08 by 2.59 metres. The room contained a well about 1.22 by 1.52 metres, explored to a depth of 6.71 metres, which may have monitored groundwater. Two further recesses in the north wall have an uncertain function.
From the entrance chamber, a vaulted corridor continued northward in two sections separated by a passage chamber. Its average incline was approximately 6 degrees 46 minutes, with a shallower lower section and a steeper upper section. The passage chamber measured approximately 3.19 metres north-south by 6.90 metres east-west and was filled with debris of uncertain origin. Pottery from the well room and nearby areas belonged mainly to the Middle Kingdom, with some New Kingdom and later material. The passage chamber also contained pottery from the Middle Kingdom, the Eighteenth and Nineteenth Dynasties, and the Roman period.
Antechamber and burial chamber
The corridor ended at a tall doorway leading to the royal antechamber. Cut into the limestone outcrop and faced with fine white limestone, the antechamber measured approximately 3.13 metres north-south by 4.98 metres east-west. Its walls were about 3.46 metres high, and its gabled roof reached approximately 4.41 metres. Twelfth-Dynasty pottery and a fragment of an alabaster vessel were recovered there.
The antechamber connected westward to the burial chamber through a passage whose final 0.48 metres were lined with red granite. A second doorway in the south wall opened into an alternative passage that wound around the burial chamber and entered it near the sarcophagus. Its purpose is uncertain. It may have had symbolic meaning or may have isolated the burial chamber.
The burial chamber was entirely faced and paved with red granite. It measured approximately 5.25 metres east-west by 3.13 metres north-south. Its walls were about 1.83 metres high, and its vaulted ceiling reached approximately 2.84 metres. Entrances opened from the east and north. Senusret II’s red-granite sarcophagus stood near the west wall. It was made with exceptional precision, although it had a pronounced southward slope along its length. An alabaster offering table bearing the king’s name stood before it.
A red-granite doorway in the south wall led through an unclad passage to the offering chamber. This room measured approximately 3.25 metres north-south by 2.66 metres east-west, with walls about 1.78 metres high and a vaulted ceiling about 2.78 metres high. A small western niche appears to have been cut during the Ramesside period.
The royal apartments had been robbed before Petrie’s excavation. Finds included a gold uraeus, the rearing cobra emblem worn on the forehead of Egyptian royalty, probably from a royal statue, fragments of Twelfth-Dynasty pottery, and human leg bones attributed to Senusret II. The route to the burial chamber was not protected by a portcullis.
Royal subsidiary tombs
Tomb 7
Tomb 7 lies west of Tomb 10 and east of Tomb 9. A single level was reached through a shaft 8.13 metres deep. Its antechamber had a blocked entrance, originally paved flooring, two western niches, a stepped rectangular eastern niche, and four round holes of unknown purpose.
The burial chamber was lined with fine white limestone and contained a red-granite sarcophagus set on a projecting panelled plinth modeled on the enclosure wall of Djoser’s Step Pyramid. The lid had flat ends and a curved middle. It had been displaced but remained undamaged. An eastern canopic recess held a red-granite canopic chest. Inside was a four-compartment wooden box containing alabaster canopic jars. The box was relatively well preserved, while the jars had been smashed and looted. A lung was recovered from one compartment.
The offering chamber contained remains of funerary offerings, and fragments of a woman’s skull were found in the antechamber. Canopic jars were vessels for preserving internal organs removed during mummification, while the chest held the jars together as part of the burial equipment.
Tomb 8 and Sithathoriunet
Tomb 8 is the easternmost of the four southern shaft tombs. Its shaft descended 6.6 metres to a 3.5-metre-long antechamber with a statue niche and a deep recess containing the Treasure of Lahun. The antechamber walls were bare rock, and much of its roof had collapsed.
The burial chamber was lined with limestone and almost entirely occupied by a red-granite sarcophagus on an undecorated plinth. Its lid had flat ends and a curved middle. Robbers pushed it aside and made a hole through it. Surviving contents included fragments of wooden coffins and pieces of gold foil. A black-granite fragment near the sarcophagus preserves part of a woman’s titulary, including the titles “king’s daughter,” “king’s wife,” and “united with the White Crown,” but the woman’s identity is uncertain.
Tomb 8 had a canopic recess and an offering chamber. Its smoothed white-limestone canopic chest had a curved lid and contained a badly decayed wooden box with four alabaster canopic jars in excellent condition. The jars held cedar pitch, sand, and mud rather than preserved organs. One jar bears the face of Qebehsenuef, one of the four sons of Horus traditionally associated with protecting the intestines.
The offering chamber produced an inscribed alabaster jar naming Sithathoriunet and identifying her as a royal daughter, along with beads, bones of offered cattle and birds, copper fragments, and pottery. A finely made alabaster vessel survived with only minor chipping to its lid. The Treasure of Lahun had been placed in five wooden chests inside a recess approximately 1.6 metres deep with a low sloping ceiling. The chests had decayed, but the deposit included jewelry, necklaces, diadems, an ivory-inlaid wooden box, a razor, a mirror, objects bearing the name of Amenemhat III, hair from wigs, and silver and copper fittings.
Tomb 8 was built approximately thirty-eight years after Senusret II’s death, during the reign of Amenemhat III. Its burial equipment had already been plundered in antiquity when Petrie and Guy Brunton excavated the tomb in the early 1910s.
Tomb 9
Tomb 9 is the westernmost of the four southern shaft tombs. Its shaft descended 11.1 metres, and a staircase 1.9 metres wide led down from the west before turning north. A second shaft reached a lower level through a corridor 12.2 metres long.
The upper level contained a burial chamber, an eastern canopic recess, a northeastern offering chamber, and a secondary lower chamber. Its unfinished walls show that this stage of the tomb remained incomplete. The lower level had a rock-cut antechamber and burial chamber, with the canopic recess placed to the south and the offering chamber to the northeast. The antechamber and burial chamber were lined, paved, and roofed with fine white limestone, while the other rooms retained bare rock surfaces.
The burial chamber had a slightly curved ceiling imitating a carved vault. Much of its limestone pavement was removed by robbers, who also left graffiti on the ceiling. A coffin trench suggests that Tomb 9 was the oldest of the four southern tombs. Pottery from the tomb and associated chambers dates mainly from the Twenty-Second to Twenty-Fifth Dynasties, with some pieces from the Nineteenth Dynasty and earlier periods, indicating later use of the spaces.
The pyramid town
The pyramid town north of the complex was organized around an acropolis and divided into a large-residence eastern quarter and a smaller western housing quarter. Its surviving houses and substantial papyrus archive illuminate the administration of a royal pyramid institution, the arrangement of domestic space, and the varied activities of its inhabitants.
Today, the principal visible mass is the deteriorated mudbrick pyramid core, accompanied by fragments of the limestone framework and casing. Drainage works, underground chambers, subsidiary tombs, the remains of the mortuary complex, parts of the wider burial landscape, and the excavated objects from the town and tombs preserve the physical and historical evidence of Senusret II’s pyramid complex.